Leaflets, brochures, or events – all of these avenues of advertisement are essential for the success of a professional photographer. However, the 21st Century requires you to go even further and use digital and social platforms as well to acquire more clients.
Specifically, this means Facebook. And the best way to engage with client hopefuls on Facebook is through Facebook Ads. So we’ve compiled for you a guide to learn how to both properly and effectively use Facebook Ads so you too can gain countless leads and elevate your business.
Getting Started – Facebook Ads Basics
Use a fan page! - Facebook is at constant war with anything that is fake or illegitimate. That is the main reason why they have been closing the accounts that are NOT fan pages. However, if you are a „lucky” one, who still owns a personal account, „Jane Doe Photography,” you should know that you can’t reach new customers using this account. To cut it short – Facebook Ads won’t work here, and you have to create a fan page.
Ok, so you have a fan page, and you already gained some real „Likes”. At some point, when some of your posts will be more popular, Facebook will suggest you „Boost Post” this post. Don’t do that!
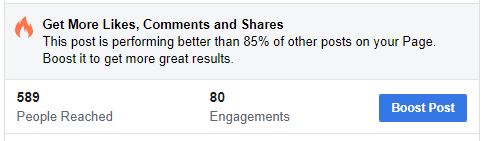
Although it seems to be quite logical to click this magic blue button, the reality is quite different, and the results of promoting via this way are much worse. Why? Facebook created this button a long time ago when its ads system was just starting, and still, it only has narrow possibilities when it comes to targeting options.
Additionally, (and what’s even more important!) after clicking “Boost Post,” you won’t have the possibility to choose the placement of your ads – Facebook will do this automatically and end up showing your ad in a place – any place – that is not occupied. In other words, it will reach a target audience the ad is not attractive for or useful for. So, how to do it in a proper way?
Choose the proper type of campaign
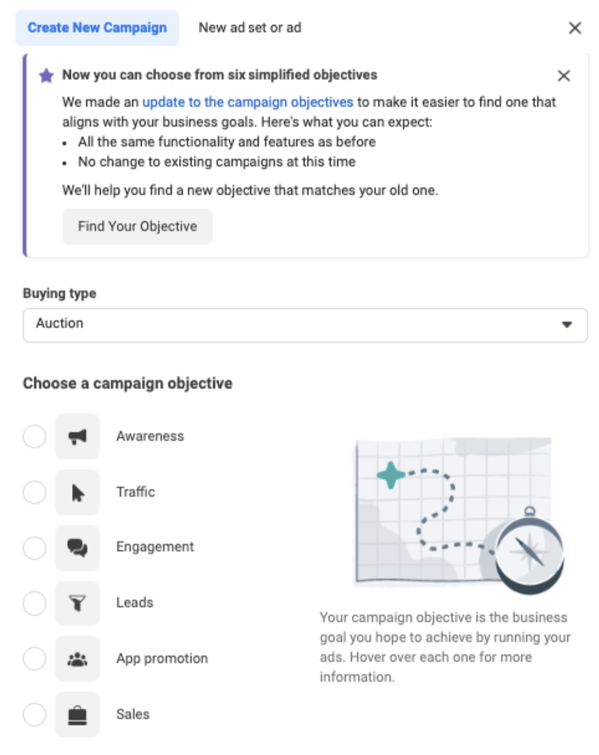
Ok, let’s get some new clients! In order to do that, go to the Ads Manager by clicking the top-right corner of your Facebook page and using the button „Create Ads”. Now, you can see many different types of campaigns, and your task is to choose one of them.
Facebook Ads Manager
For the beginning of your digital marketing journey, it’s best to master three objectives:
1. Traffic is the perfect solution if you have a good website.
2. Engagement – the „safer” option, which will generate traffic within your Facebook fan page.
3. Leads - direct leads generated within the Facebook fan page. It’s effective, but the cost per lead might be high.
In this article, we’re gonna use the first way. But don’t worry! We’ll have the second one covered in our second article.
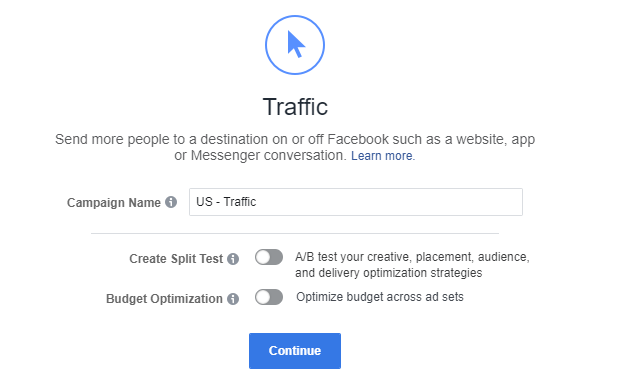
So, let’s start with Traffic, shall we?
Bring valuable traffic to your website
If you want to choose this option and transfer people to your website, you have to be really sure that your website looks (and works) amazing – both on desktop and mobile devices. In this industry, getting attention through graphics layouts and proper User Experience is crucial.
Ok, you are ready. So, let’s click Traffic and fill in the “Campaign Name” section. We suggest doing it in the following way:
Country – Type of campaign
Facebook Ads Manager
Now, you can click „Continue”.
Congratulations, now we’re in the best part!
You can fill the “Ad Set Name” section in a similar structure as you have done with “Campaign Name”, but add the phrase „couples”.
Country – Type of campaign – Target Group

Facebook Ads Manager
Keeping the naming nice and clean will be crucial with A/B testing, which will be covered in the next article.
Now, let’s scroll down a bit to the Audience section.
It's the moment when you should think about your perfect customer and analyze whom you have already reached. Facebook’s ability to target the audience is enormous – within this article, we’re gonna show you the targeting that you can easily apply for your business (focused on wedding photography).
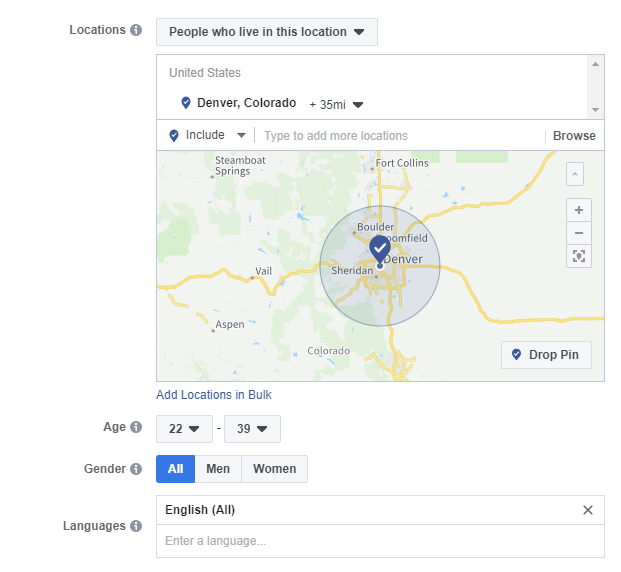
1. Locations
- select „People who live in this location” - in this way, we’ll omit people who are just passing by your area
- type the actual cities that you can provide your service – as an example, we used: Denver +35miles
- select age: 22 – 39 (according to the „2019 UK Wedding Report” by BrideBook.co.uk, the majority of couples are between the ages of 25-33, but it’s safer to start broader and then narrow it down than the other way round)
- select gender: All
- select Languages: English (ALL)
Facebook Ads Manager
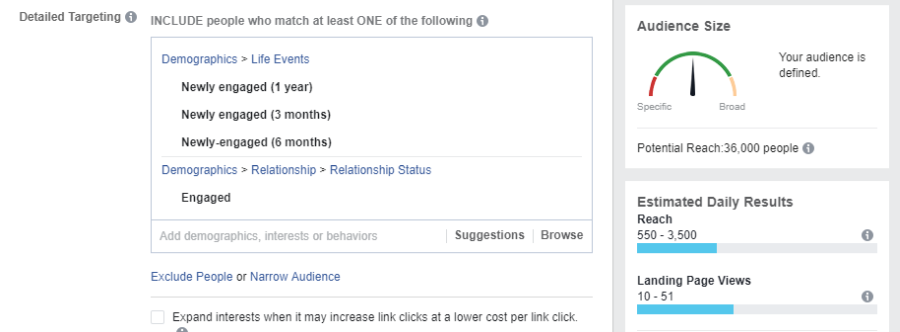
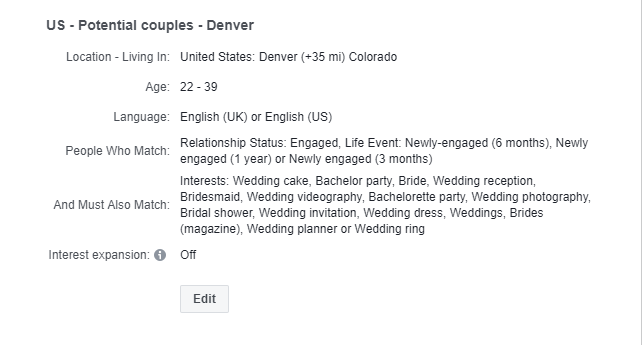
2. Detailed Targeting:
- Let’s add the following: Engaged (Relationship Status), Newly engaged 1 year (Demographics), Newly-engaged 6 months (Demographics), Newly engaged 3 months (Demographics),
Now, in the case of our example, we’ve narrowed it down to the potential reach of 36,000 people (you can see it in the bar on your right). You should expand it or lower it according to your budget.
Facebook Ads Manager
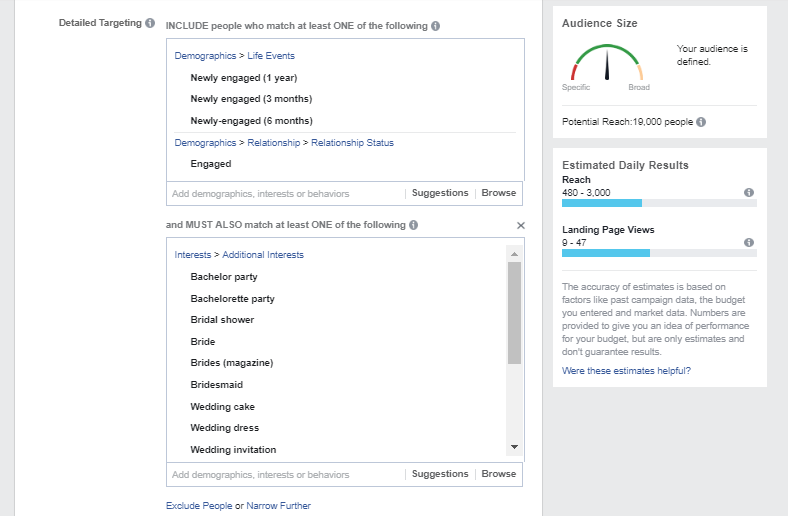
We want to start with a small budget (about $200), so we want to reach a very precise group. In this case, let’s narrow our target reach by eliminating couples who are engaged but unlikely to get married any time soon.
That’s why we click on the Narrow Audience button and select the following:
Bachelorette party, Bride, Brides (magazine), Bridesmaid, Bridal Party, Bachelor party, Wedding cake, Wedding dress, Wedding invitation, Wedding Photography, Wedding planner, Wedding reception, Wedding ring, Wedding videography, Weddings, Photographer,
Facebook Ads Manager
In our case, we’ve reduced the number of potential reach to 19,000 people.
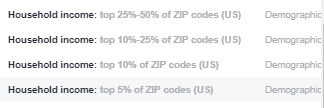
If your target is still too wide (50k or more), you can narrow it by choosing the appropriate Household income option (here you can try to distinguish whether you want to score a $9,000 USD sale or …higher!).
Alas! This option may not work for some particular states.
Facebook Ads Manager
3. Connections:
We want to have new leads, so we don’t want to show our ads to people who’ve already clicked „Like” on our fan page.
- So, let’s select: Exclude people who like your Page – and then type below the name of your fan page.
Our target group is ready – now you can click Save This Audience and name it accordingly:
Country – Target Group – Specific Place
Facebook Ads Manager
After clicking Save, we can go to the Placements section.
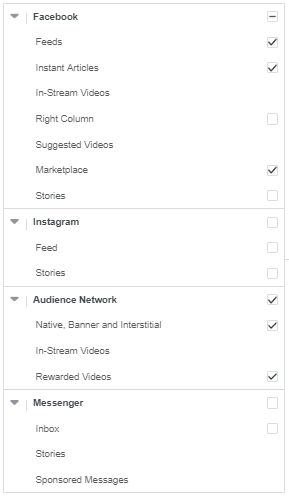
4. Placements
We strongly suggest using „Edit Placements” instead of „Automatic Placements,” which are recommended by Facebook.
With “Edit Placements”, you can select the most suitable channel where your ads will be presented. This is especially crucial in promoting photography services because your pictures should be seen in the most advantageous places. Additionally, and even more importantly, with “Automatic Placements,” Facebook will place your ad in the place where it’s needed from its perspective – NOT yours.
Below please find suggested Placements:
Facebook Ads Manager
Some of you might be wondering why we’ve actually deselected Instagram and Stories. The main reason for doing so is the fact that different resolutions are used for Instagram ads, and we’d rather suggest creating a different campaign for Instagram (don’t worry - there will be another blog post dedicated to Instagram!) than running it within one group.
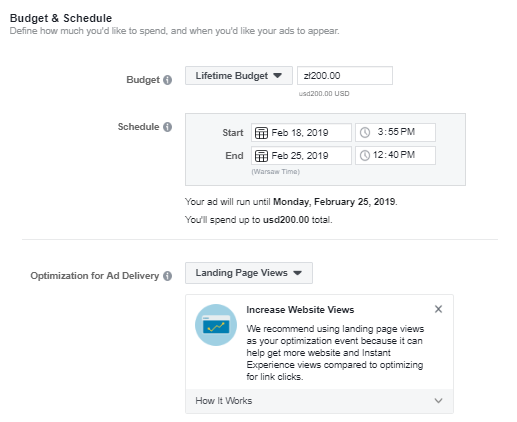
5. Budget & Schedule
Here you can select the ad budget that you want to spend on this campaign. We suggest running a 7-day campaign with a low budget, and when it performs well, you can prolong it.
Facebook Ads Manager
Due to the fact that we want to bring traffic to our website, let’s ask Facebook to optimize the campaign according to the Landing Page Views. In this way, Business Manager will be focused on people who are actually willing to leave the Facebook platform to visit other websites, so to speak – they click on the links (it also means that we will not reach the group who do not want to leave Facebook. That’s why you should also try to use an Engagement campaign that will be covered in a future article).
Now, we can click Continue and move to the Ad stage!
Create proper Facebook Ads!
6. Create an Ad
In the first section, „Ad Name,” let’s add a name according to the following structure:
Country – Target Group – Specific Place – Ad A
Why Ad A? The reason is very simple, and you have to remember it for all of your future e-marketing activities as well:
TEST EVERYTHING… AT LEAST TWICE!
That’s your key to success! We name this ad „Ad A” because you have to create at least two ads to see which creation works better for your audience (it’s called A/B testing). Fortunately, you don’t have to be a marketing expert to do this kind of test – Facebook will actually do it automatically if you create two ads within the same ad group.
Ok, we have the name; now let’s choose our Facebook Page and let’s skip the „Advertise on Instagram” section.
7. Format
You are a professional photographer – you have to attract people with your photos. Now we have to choose from 3 different formats:
Carousel (two or more scrollable images or videos)
Single Image or Video (One image or video, or a slideshow with multiple images)
Collection (Group of images that opens into a full-screen mobile experience)
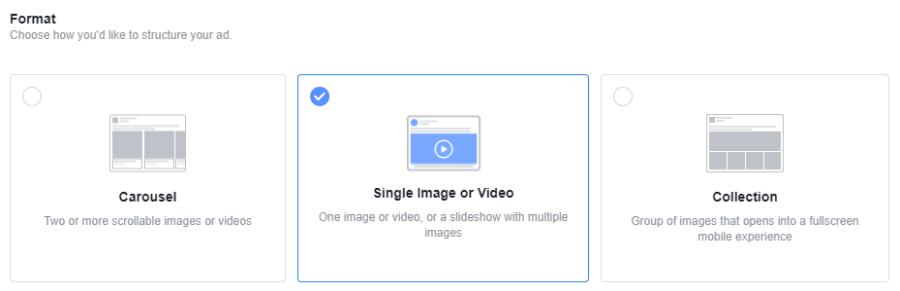
As you now know, the best option is to… test everything! But, the truth is that in the case of wedding photographers, we suggest using Single Images or Video. If you choose the “Carousel” option, you can use many photos (which is great); however, they turn out to be quite small, and, honestly, you can barely make an impression using that kind of ad. You can also choose “Collection,” but it works well only with mobile devices (and we don’t want to exclude desktop users).
Now it’s time to choose photos from your portfolio that will attract your future customers. We strongly suggest you not choose them yourself! …wait, what?
Ask Your Clients to Select Their Favorite Photos
Yes, that’s true.
The best option is to pick up ten photographs and show them to your previous customers or friends and ask them which one they actually prefer. As a wedding photographer, you already have your taste and favorite pics, but it’s the end-user that is the most important here (and it’s the actual group that we want to interact with), so don’t be afraid and let them pick 2 of their favorites ones + add 1 that you think is the best (choose something that looks good, but much different than their choice).
You can upload your images after clicking the „Upload images” button. What’s important is the size – Facebook suggests a square image with 1200 x 1200 pixels, but it’s also possible to use 1200 x 628.
8. Links
Now, let’s select the source of our traffic as „Website” and fill in the three key forms: Text, Website URL, and Headline.
Within the first form, be as creative as you possibly can. However, keep in mind your real marketing objective for this point – that is, to transfer the traffic to the website. It means that in the text, you need to use CTAs such as „To see my full portfolio click on the image below” to suggest to users how they should interact with the ad.
A similar strategy can occur in the third form – Headline, where you can include your key features as a photographer (something that highlights you / or your offer among other photographers, i.e., ‘John’s All Natural Lighting Wedding Photography’).
You have to keep in mind the fact that you are actually reaching people who want to get married, so you can be very creative and use such texts as: "Congratulations!!! Now it's time to choose your wedding photographer!".
In the Website URL section, we suggest putting a link to the main page instead of sending traffic to one of your subpages.
Always choose one of the possible „Call To Action” buttons (and remember to use its particular name within the Ad Text), such as „Book Now”, „Learn More,” or „Watch More”.
The three final sections are optional (Display Link, News Feed Link Description, and URL Parameters), but in the first two cases, they have been filled automatically, and there is no need to change them (unless you don’t have your metadata properly filled on your website).
Now, you can see your Ad on the right side of your browser, and we recommend clicking on each type of Feed to see whether the text and the picture are displayed in the proper way.
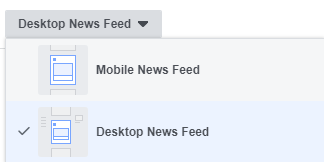
Facebook Ads Manager
Wedding Photographer - Launch Facebook Ads!
Congratulations, you’ve made it! If everything is OK, you can click the green button “Confirm” and start conquering the photography world.
Of course, that’s just a short introduction to the subject of Facebook Ads, but we’ll surely prepare more tips for professional photographers.
If you have any questions regarding Facebook Ads, or you just want to share with us your experience – do let us know in the comments section below!
*NOTE: It’s important to mention that the general appearance of Facebook’s website (and Business Manager as well) differs for every user. That’s why some buttons/options might be in different places than those shown on the screenshots.
Need a wider understanding of digital marketing as a whole? We have a whole Digital Marketing Guide for Photographers, available for download as a PDF, completely free of charge. Click below to check it out! There is also a discount offer found inside.
