It’s no surprise that Instagram is still crucial for every professional photographer, and if you want to be booked all year, you must be present on Instagram. On April 9, 2012, Kevin Systrom and Mike Krieger sold their platform to Facebook, connecting two of the most recognized names in Social Media into one, which propelled Instagram’s rapid growth. In addition, this buyout also put two different ad systems into one.
Thus, A/B testing should not only be focused on particular ads but also on testing different channels and verifying the results. In this article, we’ll continue our e-marketing journey as a professional photographers and dig deeper into the proper strategies for Instagram Ads campaigns.
Facebook is Not Enough
In the previous article, we covered starting a Facebook campaign for Wedding Photographers (CLICK). You may think it should be your first and only choice when running your ads because its ad system (Ads Manager) is based on Facebook. However, when you learn the basics of FB Ads, you can extend your marketing activities on Instagram. Here is a simple graph showing why you should start…
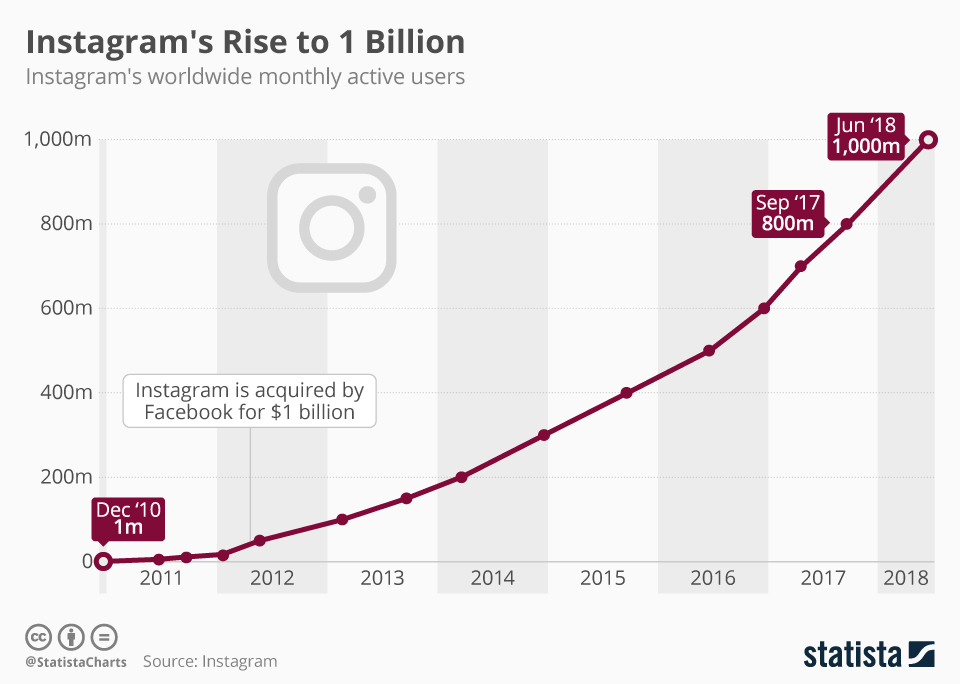
Source: www.statista.com
Of course, the number of users is only one reason. As a professional photographer, you should think of a different logic: Instagram is all about the visual experience! People use this platform on their Mobiles where the whole screen is covered with the image (and only after scrolling down the post can you see two lines of text). So, you have the perfect possibility to amaze the right audience with the best possible photo!
Let's Start Instagram Ads
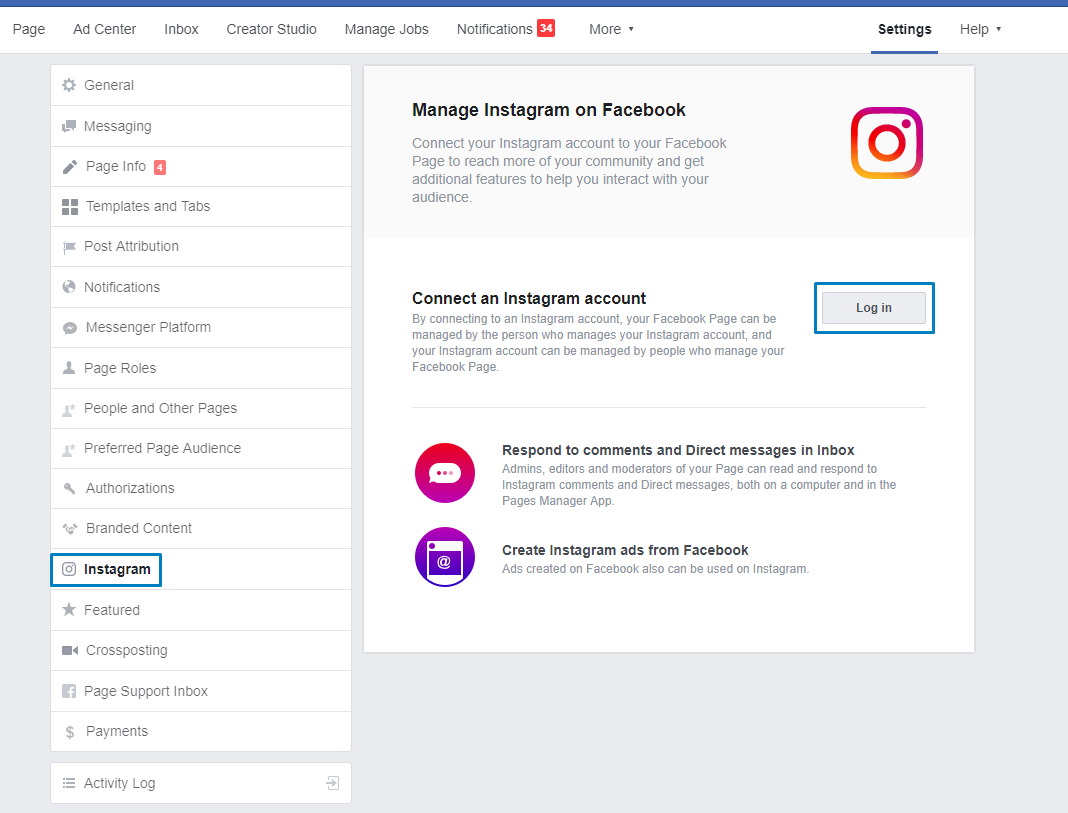
First of all, we have to connect your Instagram account with your Facebook fan page – otherwise, you won’t be able to promote Instagram posts that already exist (for those who already have done it, you can skip this paragraph). Next, enter your Business Page settings and select Instagram on your left.
Now, please fill in your login and password and continue with the whole process.
Go to the Ads Manager, select your Ad Account, and click the green button “Create.”
Facebook Ads Manager
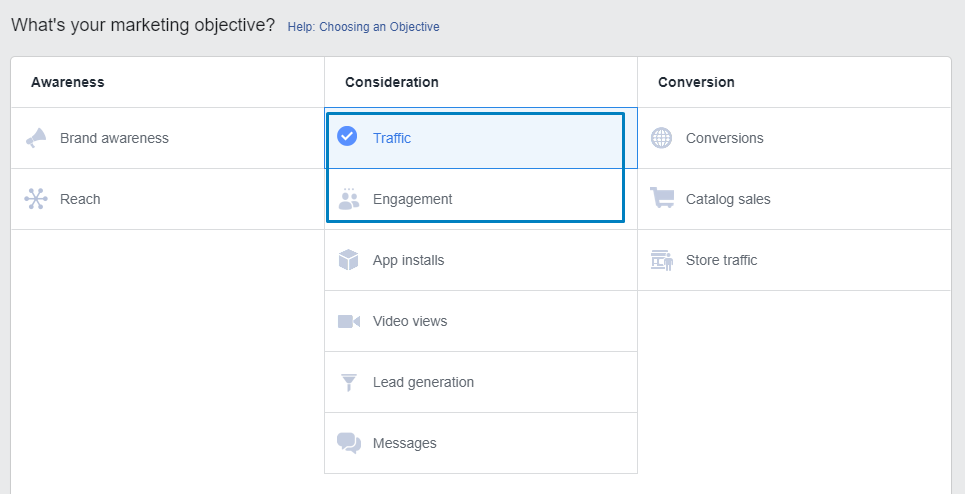
Now, we can see multiple different objectives. In the case of Instagram Ads, we strongly suggest using two of them:
• Traffic
• Engagement
Especially the first one is valuable for your Instagram page because it will differ from other organic posts on the platform. This post will have a CTA button to transfer users to the appropriate landing page. Also, as mentioned, this will make your post appear unique and more visible among other posts.
 Instagram post without CTA
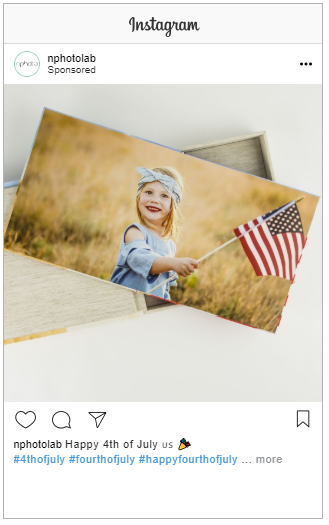
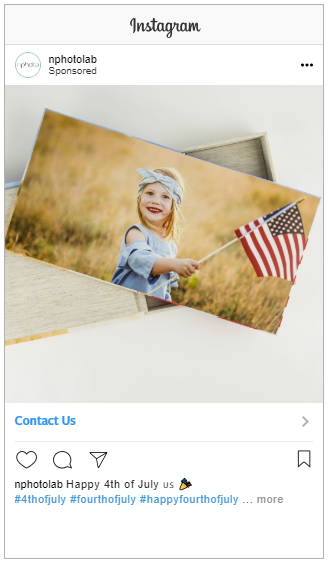 Instagram post with CTA
Extra tip!
You can use this option when doing special campaigns (such as occasional mini-sessions) and add text on the image telling people to click the button below. In this way, your Click-Through-Rate will be higher, and the cost of the ad – LOWER! :)
At this stage, you can name your Campaign. However, we strongly suggest adding the phrase “Instagram” to make it easier to analyze with other campaigns.
Proper Targeting on Instagram
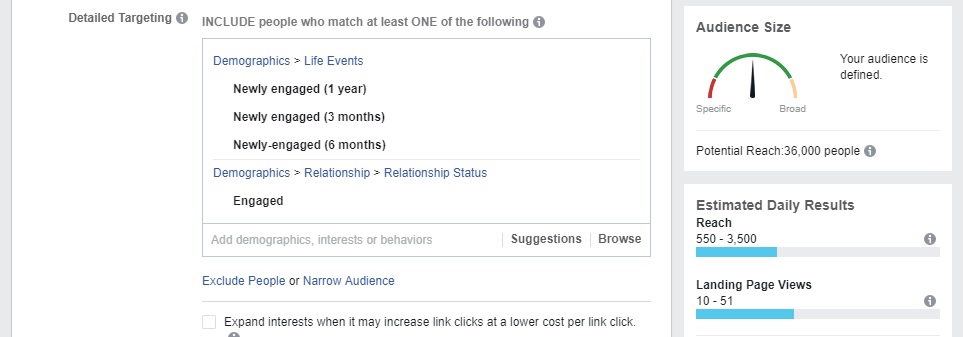
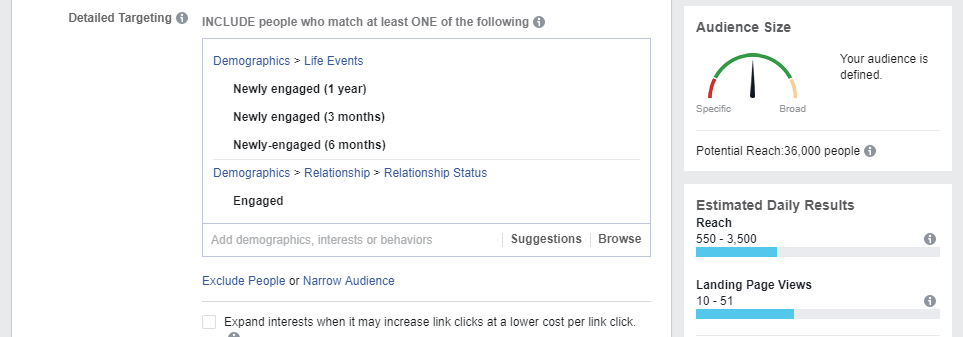
Ladies and Gentlemen: let’s use (probably) the most extensive data possible! Thankfully, Instagram has the same targeting system as Facebook, so we can be almost 100% sure that our target group is highly accurate. Furthermore, we can select the “People who live in this location,” their age, and what’s most important – their relationship status. Below, please find our proposition for targeting engaged couples.
Facebook Ads Manager
- Let’s add the following: Engaged (Relationship Status), Newly engaged for one year (Demographics), Newly-engaged six months (Demographics), Newly engaged for three months (Demographics),
Now, in the case of our example, we’ve narrowed it down to the potential reach of 36,000 people (you can see it in the bar on your right). You should expand it or lower it according to your budget.
Facebook Ads Manager
To master targeting “Potential Couples,” read our section Bring valuable traffic to your website in the article: Facebook Ads for Wedding Photographers – How to master it?
How to Set Up an Ad on Instagram
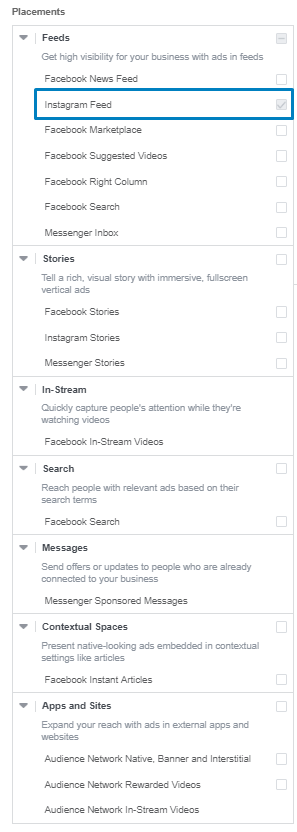
We reached the section where the system asks us about ad Placements. Here you have to be careful about what you select because Ads Manager randomly selects “Automatic Placements” and even states that it’s “Recommended” (huh!).
So, you must click “Edit Placements” and deselect everything but “Instagram Feed.” Please notice that this section might look different on your profile because Facebook has started introducing new layouts to other users.
Facebook Ads Manager
When you select a proper Placement, we suggest limiting your Ad only to people who use their Mobile phones. Why?
Mainly because people who use Instagram on their desktop are people who use it for work (i.e., marketing agencies, social media ninjas, etc.), and that’s why the CTR for desktop users is much lower than for Mobile. What is more, Instagram is an App, and couples often view Instagram together on a mobile phone. But as always – you can test it on your own and see what’s better :)

Facebook Ads Manager
Regarding the Budget & Schedule section, be sure to select “Landing Page Views” (not Clicks), but only in case when you have Facebook Pixel installed on your website (don’t worry – we’ll cover Pixel’s possibilities in the upcoming article!). This option will optimize your Ad according to the total views of your website (Pixel will send feedback to the Ad System that the user who clicked on the Ad spent some valuable time on your website).
This information can be crucial for Facebook when selecting the proper target group – the system can choose traffic that will interact with your landing page while choosing Clicks will focus Facebook on bringing you a higher CTR rate (which, in theory, might be cheaper but less valuable).
Now, we can create our Budget and Schedule – here, we suggest using a 3-7 day period for one Ad Set. Less than three days might not be enough for Facebook to find the right audience and establish a reasonable Cost per LPV. In the case of the budget, Facebook Marketing Experts always advise spending more :) However, 30-80 USD might be enough to see whether an Ad performs well and can be scalable. Now, we can click “Continue”!
Boosting Posts on Instagram
We strongly advise boosting a post that already exists rather than creating a new one in the form of a “Dark Post.” The most important reason for doing so is the fact that the number of “Likes” for already existing posts increases both – Organically and via Ads, while selecting “Create Ad” will not allow you to improve your listing (and it’s cool to have your Likes accumulated in the profile, and not to waste it as a Dark Post!).
Plus, when a user, after clicking the ad, goes to his feed and later revisits your profile, he or she will see the particular post that he or she clicked. This is a prevalent scenario, but the problem is that users won’t see your ad unless it’s a regular post promoted.
Thus, before we click anything more within the Ads Manager, let’s go to your Instagram App and add the post you want to promote. It is also advisable to tag as many objects as possible. Remember that this photo will be promoted, so in the description, add info to click the button (don’t worry, the button WILL show up later ;) )
So, let's select "Use Existing Post" and choose the proper Instagram account.
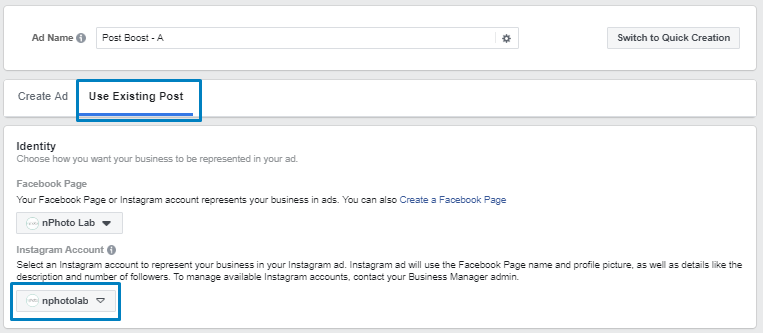 Facebook Business Manager
When you click “Select Post,” select “Instagram,” and here you’ll see all the possible posts for promotion (some Instagram posts cannot be promoted, for example, if they contain too many slides). So, select the one you want to promote and click “Continue.”
Now, you can finally add a button to your post by entering the website’s URL in the red space. This link will be “covered” as a button so you can use UTM tagging within the link.
Now, let’s select the appropriate “Call To Action” button (you can choose among 15 options so that you can balance the tone of your message) and turn on the “Facebook Pixel.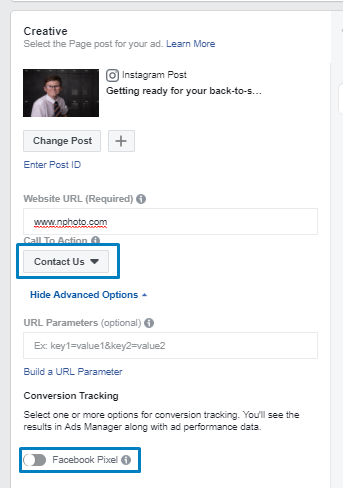
Facebook Business Manager
All is set - we can click "Confirm"!
#winning? Not Yet!
Ok, so you have successfully started your Instagram campaign. However, more than one Ad is needed. A/B testing is the key to success, so we suggest you go to your Ads section in your Ads Manager and create another Ad after one day (in the same way, but within the same Ad Set) and see the results. If the Cost-Per-Click is higher for the “B” Ad, turn it off.
The proposed method will help you get more clients from Instagram, and remember: always test your visuals and copywriting. Even good campaigns and targeting won’t gain you any positive feedback (technically wise) unless it’s done with a nice idea and … something that you have a lot of WONDERFUL PHOTOS! 🙂
Do you want to learn more about Digital Marketing for Photographers? Then, download our FREE Complete Guide - click on the button below!

Let us know in the comment section what your experience with Instagram is, and if you have any questions – we’re here to help you!
P.S.
So that you know, Business Manager may look different on your profile because it changes dynamically.